

This article has everything you need to build the perfect author website.
It includes step-by-step how-to along with templates and example author website designs so you have everything you need.
Download the Author Website Checklist
You’ve written an amazing book, but now you need a website.
It goes without saying that every writer needs an author website. A web search is the first place people go when looking you up and you want to make sure they find a website that you own and have control over. It allows you to put your stake in the ground and own your own little corner of the internet.
However, as someone who has worked with over 100 authors and gone through at least 1000 author websites, I constantly get a first hand look at how much authors need help getting their website put together.
My goal with this article is to walk you through exactly how you can get your website up and running for very little money and, if you have all the content ready, just about an hour of your time. I’m going to walk you through the best practices I’ve learned over the past ten years of working with authors to build their online platform as well as share a few of my favorite tools for getting it done quickly and affordably.
Table of Contents
- Author Website Goals
- 5 Best Author Website Examples of 2018
- Step-by-Step How to Create an Author Website
- 2 Author Website Templates
- Your Author Website
Your Author Website Goals
It’s really easy to get distracted by lots of bells and whistles as you build your author website, so I like to establish at the beginning what we are trying to do.
Here are the author website goals (in order):
- Sell Books. Don’t forget that the whole reason you have a website is so that people will eventually buy yours books. This is more important that social media, the perfect headshot, or even a gorgeous design.
- Build an Email List. Like I’ve said before, building an author email list is the most important way to build a long term connection with your audience.
5 Best Author Website Examples of 2018
Before we dive in and start building your author website, I think it’s helpful to take a look at some examples of how authors have done it right.
1. E.L. James
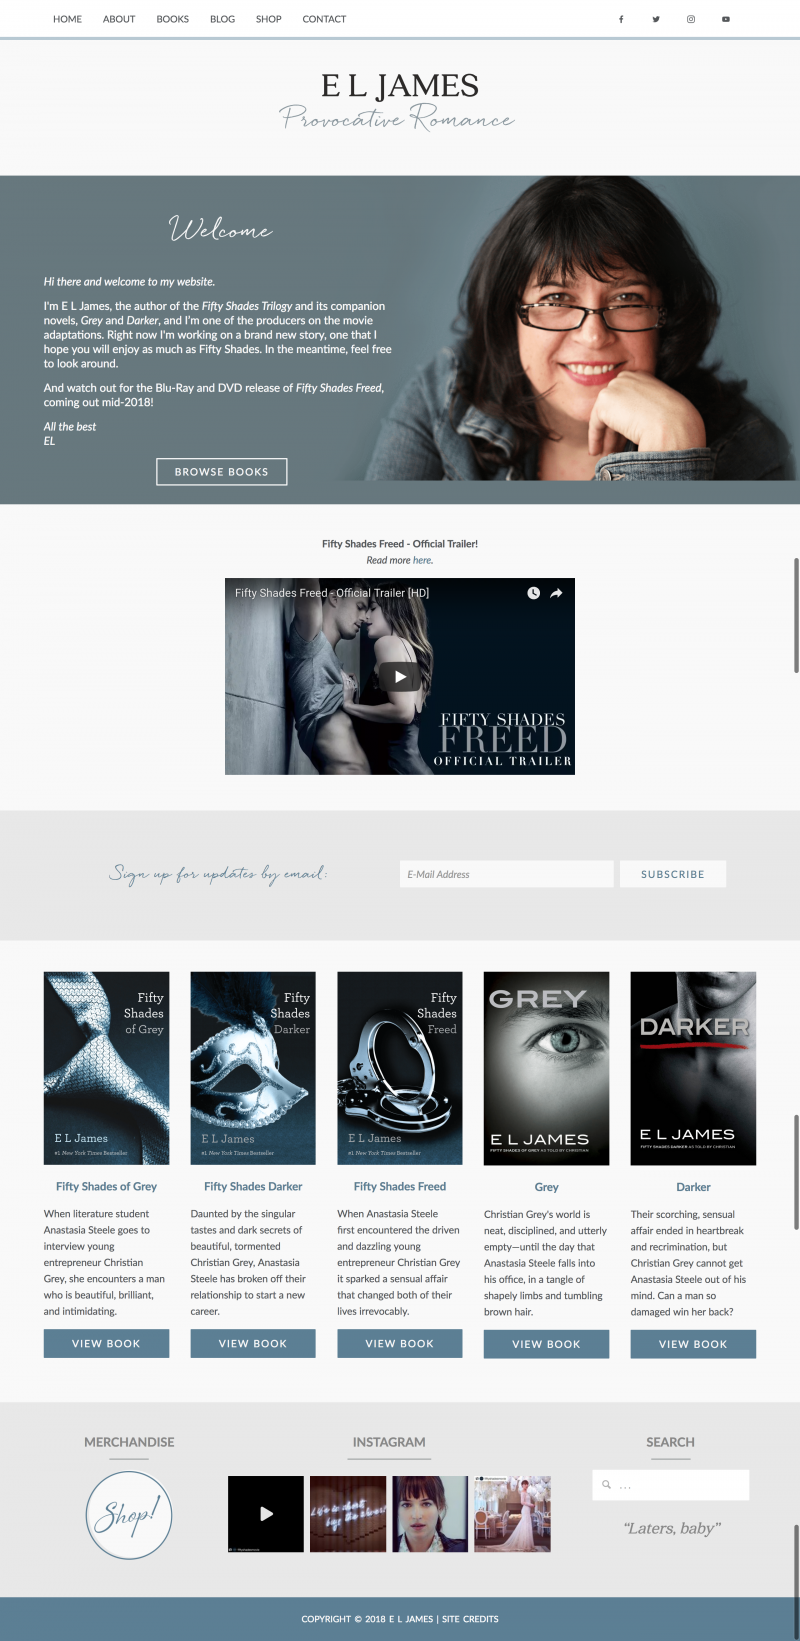
Whatever you may think of her writing, E.L. James gets a lot right with her website.
Some things I love:
- Simple navigation. One of the worst things you can do with your website is get fancy, especially with the navigation. I like that “Home, About, Books, Blog, Shop, Contact” is clear and concise.
- Welcoming feel. In the giant “Welcome” section, it’s a nice touch to have a note to visitors and a nice author photo front and center.
- Clean, organized design. There is no clutter on the website. Her books are lined up and easy to find. Connecting with her on social media is easy to find.
Could be better:
- Email list signup could be better. First, I would put it higher on the page. Second, have an invitation that is something other than “Sign up for updates by email:”. It’s important to give a great WIIFM (What’s In It For Me?).
2. Anthony Horowitz
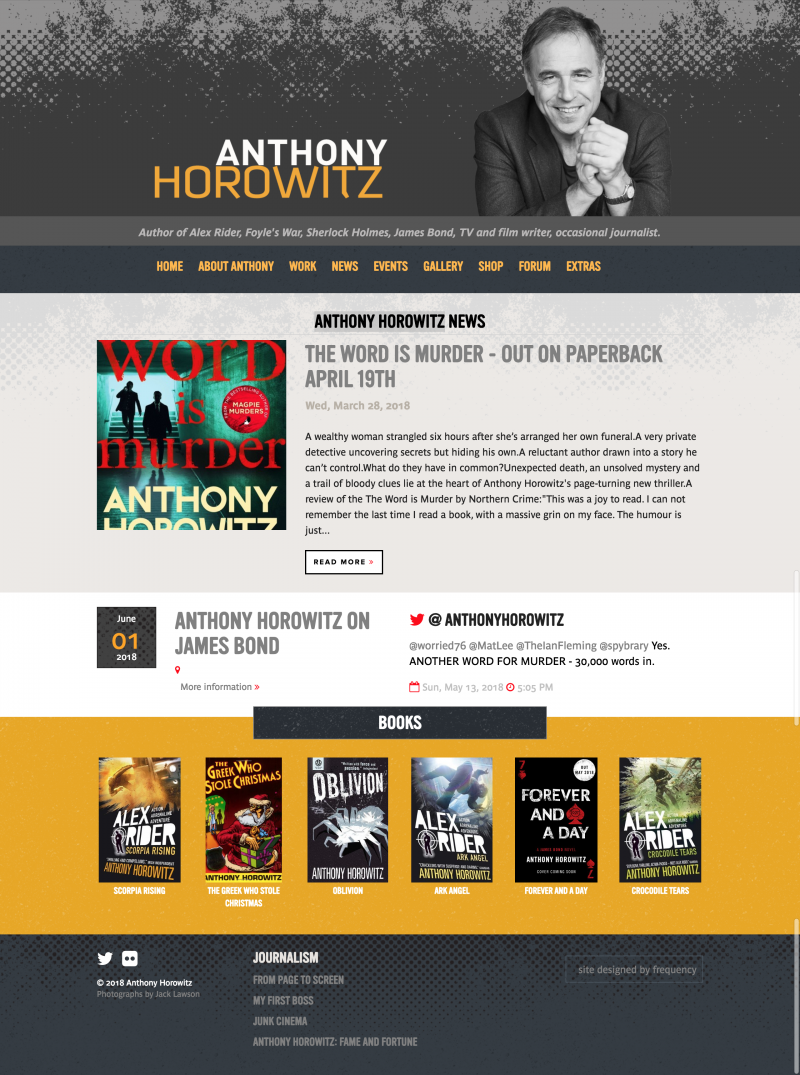
Things I love:
- Visually appealing design without being distracting or cluttered.
- Newest book front and center. It’s hard to miss what his latest book project is.
- Great introduction to himself. I like the byline on the website right under his author photo so you know you’re in the right place.
- Next event. It’s easy to not only see where he is going to be next, but it invites you to see if he’s coming near you soon.
Could be better:
- Too many navigation options. I would cut the forum (it’s sparsely populated) and combine some of the others or move them to the footer.
- No email signup.
3. Heather Sunseri
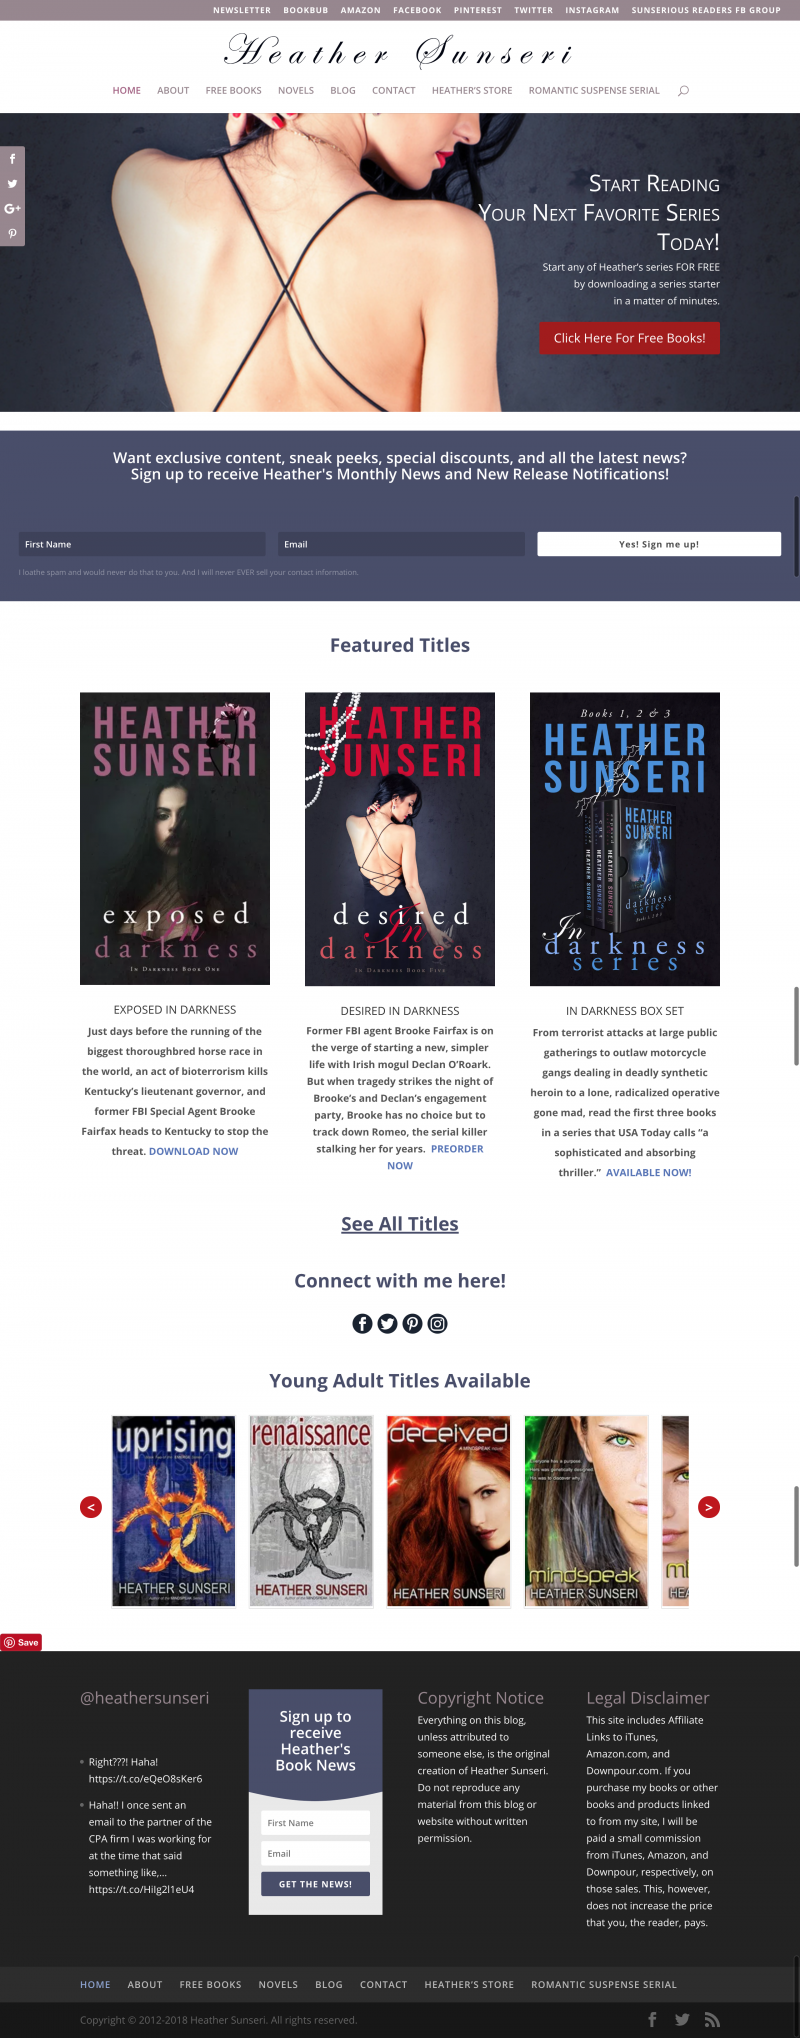
Things I love:
- Email signup front and center. The giant block offering the free series starter is going to email list signups. Also the box directly below that offers good reasons to sign up.
- Easy to find her latest books.
Could be better:
- The social media links at the very top are too cluttered and too many.
- The copyright notice and legal disclaimer should be small links in the footer to their own pages. They take up far too much room where they are.
4. Julie James
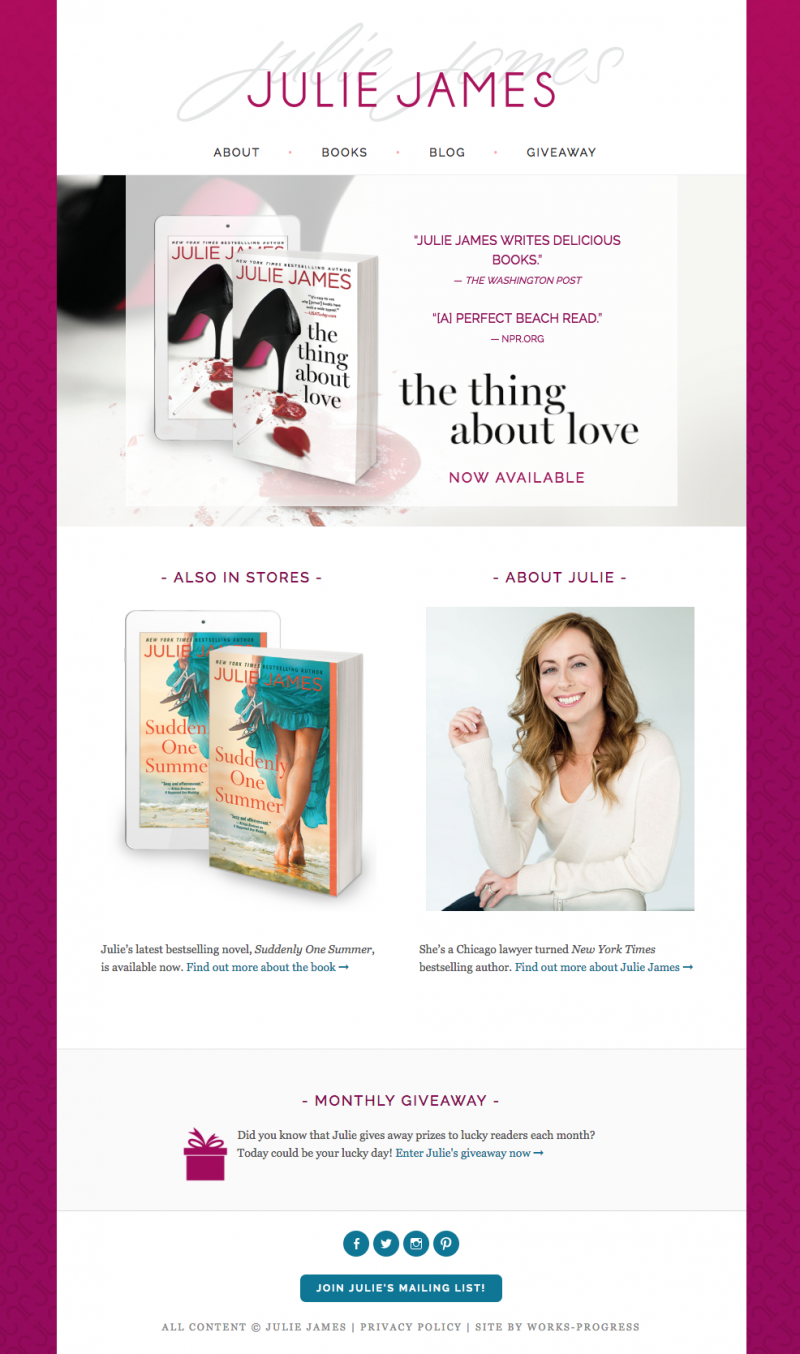
Things I love:
- Simple, clear, concise. From the navigation to the content, everything is uncluttered and straightforward.
- Monthly giveaway. This is a great way to build the email list.
Could be better:
- The blog is rarely updated. It would be better to raise the profile of the email list and get rid of the blog.
5. Antony Beaver
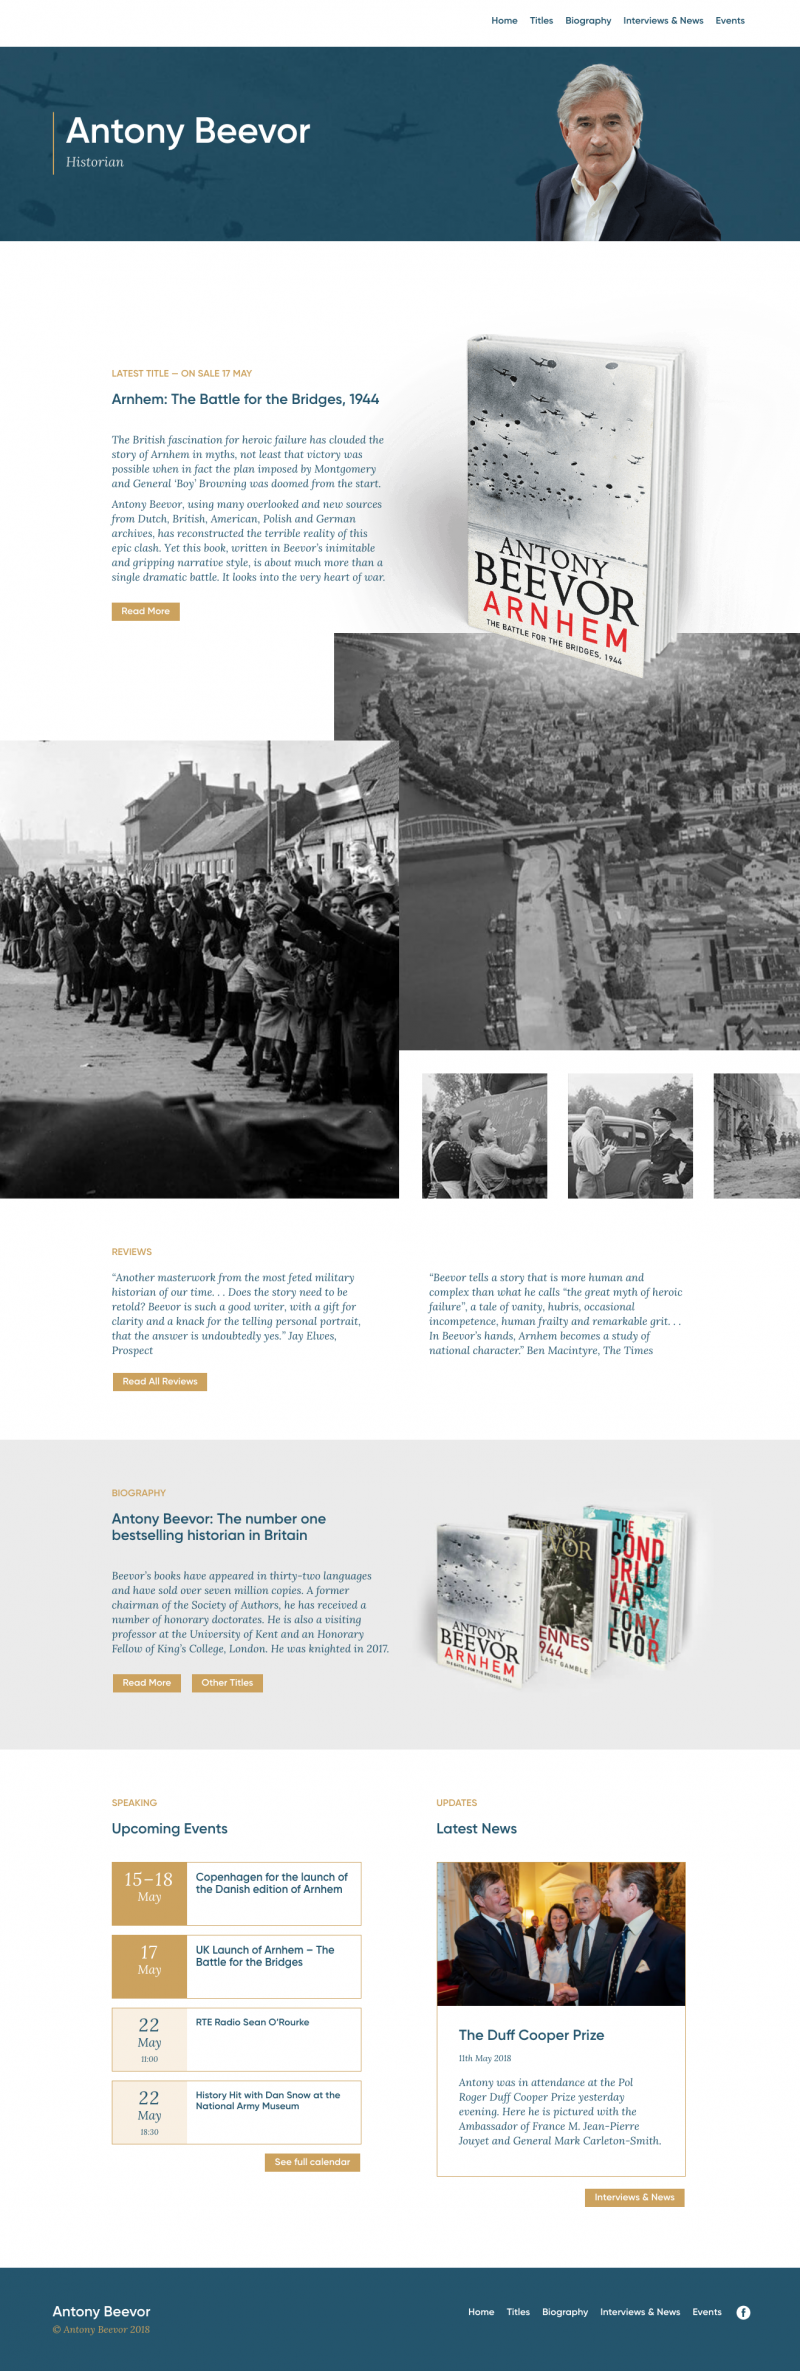
Things I love:
- Design. It fits very well with Antony’s writing and immediately grounds you in the kind of author he is.
- Simple and clear. This continues to be a theme of what makes an author website good. The design isn’t cluttered. The navigations is straight forward and the site flows well.
- Books (with reviews) are front and center.
Could be better:
- No email signup.
- “Titles” should be renamed “Books”.
Download the Author Website Checklist
Step-by-Step How to Create an Author Website
There are five steps to build your author website:
- Choose a Domain Name
- Signup for a Web Host
- Choose the Right Platform
- Choose an Author Website Theme
- Add Your Content
- Customize with Plugins
1. Choose a Domain Name
The first thing you need before setting up your website is a domain name. That’s the .com, .net, .org, etc that people will type into their browser to go to your website. In order to have a website, you need a domain name.
A lot of authors default to setting up their website under their book title or a book series or a book’s main character. I highly recommend you don’t.
Setup your website under your own name.
You have a long writing career ahead of you. Odds are, your writing is going to change. What you write about today will very likely shift and change over time. While today you can’t imagine writing anything other than this trilogy you’re currently working on, given enough time, you’re going to shift to something new.
The one thing in life that you can count on staying the same is your name. Build your author platform around your name.
What if your name is taken? What if your name is Mike Smith and mikesmith.com is long gone. Get as close to your name as possible. If you can’t get mikesmith.com, I’d look at buying mikesmithauthor.com, mikesmithbooks.com, michaelsmith.com, mikeericsmith.com (middle name), etc. Something close to your name that will be easily found when searching.
What if you’ve already setup your site under a book title or series? Unless you are planning on riding this book or series for the next decade, I recommend changing now. The sooner the better. One of my clients is Daniel Pink. His first book was Free Agent Nation. He’s since gone on to write books about motivation, sales, right brain thinking, etc. It would be really odd if he had set up everything under a site about freelancing.
What about .net, .org. me, etc domains? Be very careful with these. You’ll always lose some traffic to the main .com domain because that’s the default. However, if your .com is taken and many of the .com’s around your name are taken, it is a viable option. Just choose carefully.
How do you find and buy that perfect domain name?
The tool I recommend is www.domize.com. It is the fastest, easiest way to find domain names. On most websites you have to type in a domain, run a search and then see if it’s available. If it’s not, you have to reload the page and try again. This little tool searches on the fly and lets you know immediately what is available and what is not.
For purchasing domain names, I recommend www.iwantmyname.com. They make it simple and uncomplicated to buy your domain names. I highly recommend you do not use GoDaddy. Besides their abhorrent marketing practices, they will do their best to trick you into buying products and services you don’t need. If you already have domain names with them, you can easily switch them to www.iwantmyname.com.
2. Signup for a Web Host
Now that you have a great domain name, it’s time to get hosting for your website.
If you’re unsure of what web hosting is and how it’s different from your domain name, let me explain briefly. Your domain name is like your address. It let’s people know where you live. However, it’s not your home. Just because you have an address doesn’t mean you have a roof over your head. Your web host is your website’s home. It’s where your actual website lives. All of the HTML, CSS, PDF, JPG, etc files have to be on a computer somewhere that people can access. This is where the web host comes in. For a pretty small fee, they will take care of storing all of your website files and making them available to people online. In a little bit I’ll show you how to get your website setup on the host, but for now, just know you have to get a web host.
For your hosting, I recommend BlueHost. It’s a very affordable option that lots of high-profile sites use. They have great support and make it dead simple to install your website and get it up and running.
To get it setup, visit BlueHost.com and click that giant green “Sign Up Now” button. They’ll walk you through the process of getting everything purchased and setup.
3. Choose the Right Platform for your Author Website
Unless you’re planning on hand-coding HTML, PHP, CSS and JavaScript, you’re going to want to use an existing web platform to set up your website. Luckily, there are a lot to choose from.
The one that we strongly recommend is WordPress. Here’s a few of the reasons:
- It is the most popular platform used across the internet.
- There is a powerful community around it. If you ever have major trouble with your website, you can easily find someone to help.
- Thousands of plugins have been developed that you can access for free to add customized functionality to your website. I list a few of my favorite below.
- Thousands of themes have been developed that allow you to customize the design of your website.
- It’s what I use for this website.
Another great feature of BlueHost is it allows you to install WordPress with just a few clicks! Once you have signed up for BlueHost, check out this video that will walk you through getting WordPress installed in less than five minutes.
4. Choose an Author Website Theme
WordPress makes it really easy to change the design of your website. There are hundreds of themes available that you can install and customize.
For a walk-through on how to install themes on your website watch this short video:
When it comes to choosing a theme, there are two options.
Free. There are literally thousands of free themes to choose from. I would recommend starting with TwentyThirteen from the creators of WordPress. It’s not their newest theme, but it is the easiest to setup based on my advice here. In has a lot of great functionality and offers a lot of customization. If you want to get your website setup and start adding content right away, stick with this default theme.
The downside to free layouts are they are often hard to customize and come with no support.
Premium. Usually for less than $100 you can pickup a premium theme that has a lot more functionality and comes with support, customer forums, and most importantly, documentation on how to get the site setup. Here are my picks.
- Thrive Themes. If I had to pick just one option to recommend, it would be from the company Thrive. Check out their Ignition Theme. Combined with their amazing drag-and-drop Thrive Architect you’re able to create a great looking website that is highly customizable. Warning: If you aren’t tech savvy, there’s a learning curve so be prepared to spend a few hours going through their documentation and learning how to set it up.
- Published: A WordPress Author Theme or Cadmus: A WordPress Theme for Authors – These two themes are much easier to setup. They are also a little cheaper. The only downsides are you don’t have as many layout options and having an email signup on the homepage is harder to do. That said, you get a great site that you can setup in less than an hour.
5. Add Your Content
Up until now, most of the advice applies to anyone setting up a new website. This is the part of the article where we dive deep into how you add content to your new WordPress site and what content every author should have on their website.
Before we start adding content to the site, I have two quick videos for you to watch that will teach you how to add pages and content to your website:
What pages should your website have?
What I’m about to share with you is the content and pages that every author website should have. It may be the case that you will have additional content to add, but this is meant to be a jumping off point. It’s also meant to be a checklist to make sure you don’t miss something important. So many author websites I see have many fundamental pieces missing. I’ve seen sites that don’t have buttons to purchase the book, have no way to contact the author or have no descriptions of books. I once had to rebuild a site for an author because you couldn’t even tell there was a book for sale!
These guidelines will help make sure you don’t miss an important aspect of your author website.
Here are the basic pages every author should have on their site as a bare minimum:
- Homepage
- About
- Books
- Contact
Here are three additional pages most authors are going to want as well:
- Events
- Blog
- Resources
I’m going to go through each of these pages and share exactly what content should be on each one. But before I move on, let me touch on one thing.
Email Lists
Your #1 goal in building out your website, and in everything you do to market your books online, is to grow your email list.
If you followed me long – whether through my book Your First 1000 Copies – my focus on email lists won’t be a surprise to you. However, if you’re a little confused around why I say your email list is more important than Twitter, Facebook, blogging, podcasting or anything else you do, then I highly recommend you pick up a copy of my book.
As I step through each of these pages and highlight the content that should be on each one, you’ll see that your email subscription box shows up a lot. Once you understand how powerful having the direct connection to your audience through email is, you won’t be surprised.
Click here if you need help getting your email list setup.
What should I put on each page?
In this section I’m going to step through each page and share exactly what content you should make available on each one. Once again, this is a guideline to make sure you don’t miss anything important, but feel free to make it your own.
Homepage
Your homepage is a portal. Don’t try to cram everything in, but don’t leave off the important things either. Give highlights of your most important things and allow people to click to find out more.
- Latest book – Make your latest book front and center on the site. Show the cover, give a brief description including blurbs and make the links to purchase very prominent. This serves two purposes. First, it makes it easy for your fans to buy your new book. Second, it’s good for branding. If people have read your latest book and land on your website, they’ll immediately know they’re in the right place.
- Email subscription box – As either #1 or #2 call-to-action on the page, invite people to join your email list.
- Headshot and short bio – Have your headshot and a short bio that ends with “read more” and links to your About page. Again, this is good for branding. You want visitors to know they’re in the right place. Pro tip: Use the same headshot everywhere – Facebook, LinkedIn, Amazon Author Page, website, etc.
- Excerpts of other content – Show your latest three blog posts or links to your resources page or short stories you have available online. Make it easy for visitors to find additional content online.
- Connect – Highlight where visitors can connect with you online. Social media links, contact page, etc.
About
This page serves two purposes. It allows readers to learn a little bit more about who you are and what you do. It also allows media, bloggers, etc to easily get information and images when needed.
- Headshot – Use the same picture as the homepage. Potentially make it available in hi-res to download if you are planning to do media and interviews.
- Short bio and Long bio – Give two versions of your bio. A two paragraph version that is very straight forward and then a longer version that goes into your background, where you grew up, what led you to being a writer, etc. Again, this is a place for readers to get to know you so don’t be afraid to share your personal story.
- Email subscription box
Books – Overview
Make sure it is easy to find all of the books you’ve written in one place. Especially for fiction writers, your backlist is extremely important. On the books overview page you should have all of your past books showing in reverse chronological order. For each book on this page you should have:
- Book Covers – The most instantly recognizable part of your book. Make it front and center, though if you have a larger backlist, I recommend showing them as thumbnails so people aren’t overwhelmed.
- Title
- Short description
- Links to buy the book
- “Read More” link – Link to the Single page for the book (covered in the next section)
- Email subscription box
If you’d like to see one of these Books – Overview pages in action, the one we did for Hugh Howey is one of my favorites.
Books – Single
For each of your books, you should have an entire page of your website dedicated to it. You can link to it directly when promoting the book, but it is also linked to via the “Read More” links on the Books – Overview page.
- Book Cover
- Title and Subtitle
- Full Description
- Blurbs and Testimonials
- Links to buy the book
- Email subscription box
Books – “What if I don’t have a book yet?”
If you’re working on your first book, I still recommend you add a Book page to your site.
Add as much to this page as you currently have, and continue updating it until you have all of the pieces listed above.
If all you know is a tentative title and short description, add that. Once you have a cover, add that too.
This is the preview page for your upcoming debut title!
Contact
Make it extremely easy and clear how people can contact and connect with you.
- Email address – I still see people from time-to-time not want to post their email address online for fear of spam. As long as you are using a reputable service such as GMail, you shouldn’t have to worry about this. I’ve been posting my email address all over the internet for years and have basically no trouble with spam.
- Mailing address – If you’re uncomfortable sharing your home address, use your office address or a PO Box. It’s important to make it easy for people to mail you things. I recently received my first handwritten thank you note from a reader and it meant a lot to me.
- Social media links – Share your Facebook, Twitter, Google+, Pinterest, etc links for everywhere you are active so people can connect with you on these platforms.
- Contact form – While this will merely sends an email to your inbox, it saves an extra step for the visitor so is nice to have.
- Email subscription box
Events (or Speaking)
This is one of the pages that not every author is going to need. However, if you regularly speak (or would like to) or have a book tour coming up, it’s important to have this information on the website.
- Speaking
- Speaker reel or video – Let event organizers see you in action.
- Contact – Make it clear who and how to contact to hire you.
- Topics – List 3–5 topics that you are comfortable speaking on.
- Social proof – List out logos and venues where you have spoken before.
- Events (or book tour)
- List of upcoming events including cities and locations.
- Contact – Make it clear who and how to contact you to set up an event.
Blog
Whether you should blog or not is outside the scope of this article, however there’s a few things you want to have in place if you decide to start blogging.
- Blog posts
- Author – List your name as the post author, even if it’s your website. You want to make it very clear to new visitors that you are the one writing.
- Share links – Make it easy for people to share your blog posts through social media.
- Comments – I recommend starting out by opening comments. You may have problems with people being trolls, but I find for most authors this isn’t an issue. You can always block people or close comments later if it becomes a problem.
- Sidebar – Most blogs have a sidebar and it’s a great place to pull new visitors deeper into the site. Don’t overload it though with word clouds and other miscellanea.
- Email subscription box
- Headshot and short bio
- Latest book
- Popular posts
Resources
Having a resources page is a great way to share your “evergreen” content – the content that doesn’t get old over time. Use this to share your tips on writing, short stories, white papers, videos, interviews, etc. It’s going to be extremely specific to you and your platform so I don’t have any specific things that have to be on the page except, of course, for an email subscription box.
These are the pages and content that you should consider having on your author website. Overall, you want to make it easy for people to know they’re in the right place, buy your books, sign up for your email list and connect with you through your content.
6. Customize with Plugins
One of the great things about WordPress is the vast array of plugins that are available to help add functionality and customization to your website. However, as of this writing, there are almost 30,000 plugins available in the WordPress Plugin Directory. That’s a lot to wade through! Here’s the ones that we use and recommend:
- Jetpack by WordPress.com – This is a plugin built by the same people who created WordPress. It offers a lot of great functionality including easily embeddable media (YouTube, Vimeo, etc), social media integration and much more.
- Optin Monster – The best popup and slide over tool for email subscriptions. Offers themes, split testing and lots of other options.
- Google Analytics for WordPress – Makes it easy to integration Google Analytics into your website.
- All in One SEO Pack – A great tool to automatically make your site more friendly to search engines such as Google and Bing.
- BackUpWordPress – Keep your website backed up for when disaster strikes.
- Limit Login Attempts – A great little tool that keeps your WordPress site safe from hackers.
- Sumo – Makes it easy to add email signups and social share to your website.
Download the Author Website Checklist
2 Author Website Templates
Sometimes it’s hard to look at an existing website and figure out what should go where. I created these two templates to help you see how best to arrange your website.
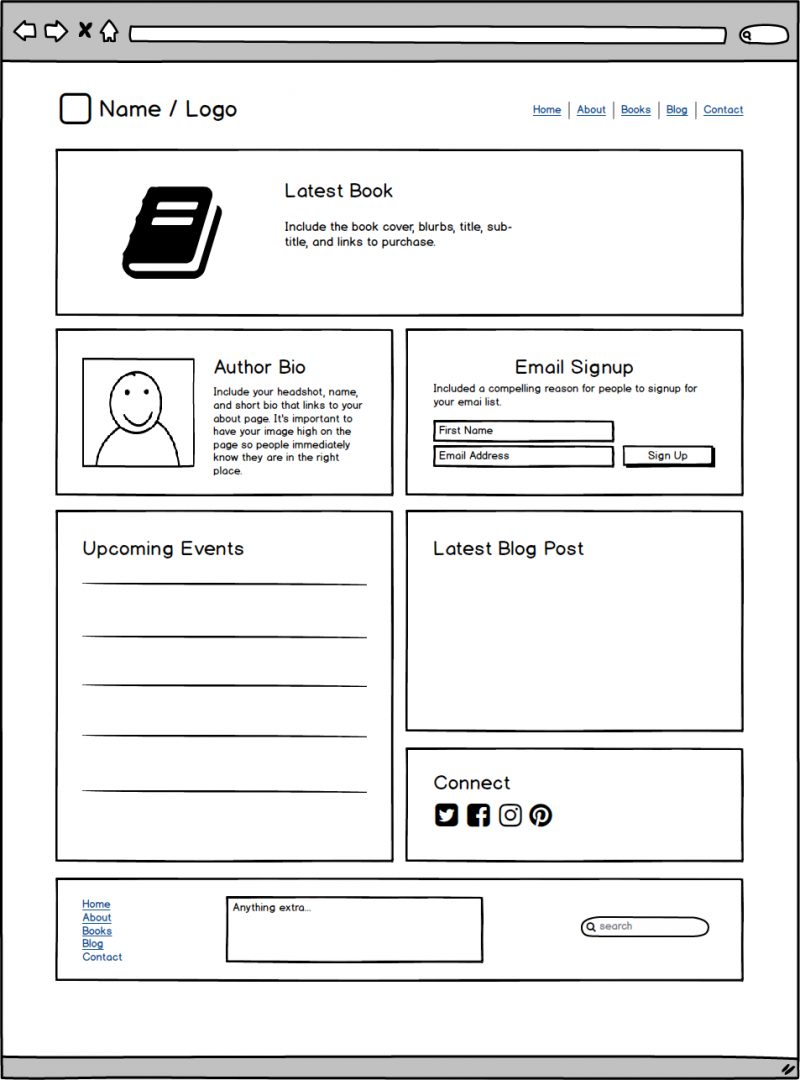
Author Website Template #1
This template allows you to highlight your latest book at the top of the page while keeping your bio box and email signup “above the fold.”
Author Website Template #2
This option allows you to have a welcome box at the top of the site while keeping your latest book and email signup front and center.

Your Author Website
Having the home for your writing career established online is an important step in building your platform and selling a lot of books. It’s the first place people are going to go to find out more information about who you are and what you do.
However, having an incomplete or bad website can hurt you more than help. It doesn’t have to be the most beautifully designed website, but it does need to have the right information and content readily available to visitors.
Make sure your website reaches these four main goals:
- Let’s people know they’re in the right place (headshot, book covers, etc).
- It’s easy for people to find and purchase your books.
- It’s clear that people should sign up for your email list.
- It’s easy to connect with and/or contact you.
I hope this post has been helpful in getting your website setup and getting the right information up.

Leave a Reply