When you have a book launch coming up, there are plenty of things to be stressed about.
Book website, pitch emails, your Amazon page, email lists, social media . . . it all has to be done.
So any time I can do something that saves me time, hassle, and stress, I jump on it.
This is where your book’s media kit comes in.
Your book media kit is where your fans, friends, and influencers get everything they need to help promote your book.
If you’re going to be a guest on a webinar or podcast, or interviewed for a blog — or even if you’re just asking your fans to help spread the word — it’s essential that you have a single location where they can all find the information and images they need.
So how do you create the perfect media kit?
After working on dozens of launches, and promoting a number of books to #1 on the New York Times bestseller list, I’ve developed a great system.
This will save you a ton of time and effort, and make it really easy for people to help promote your book.
The Goals
The goals of your media kit are:
- Make it easy to promote your book. The entire goal of the media kit is to shorten the path from Point A — someone wanting to promote your book, to Point B — that person actually promoting your book. You need to make it very easy to connect those two dots.
- Have everything in one place. Your bio, jacket copy, photos and other artwork, blurbs, review excerpts — people absolutely need those to help promote your book.
- Provide content that’s easy to update. You can create a PDF full of info to send to people, but you would have to create a new PDF every time you needed to update the content. Far simpler to have one online location you can easily add to and update.
- Store all content in one central place. Another downside of creating a PDF to pass around, is that people soon end up with outdated versions. It’s really frustrating when you finally get that blogger to post about your book and they have outdated jacket copy or an old cover design.
The Where
You want to keep your media kit in a place that’s easy to update from anywhere, and stored in just one place that everyone can access.
This means that you need to keep your media kit in a cloud—and the tool I recommend is Google Drive.
You can easily create a Google Doc there, which is basically a Word file, that will hold all of the content for your media kit.
The reason I like Google Drive is because it’s a familiar system. If you know how to create a Word document, you can easily create your media kit as a Google Doc.
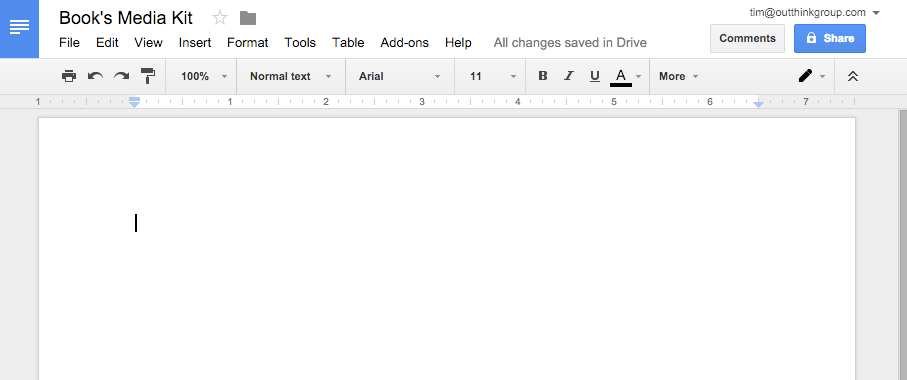
Later in this article, I’ll show you how to easily share this document with other people.
The What
Now that we have a fresh new Google Doc ready for all of your content, what do you put in it?
Here’s everything you should consider putting into the document, to create your perfect book media kit:
1. Book Description (short and long version)
This is where you share your book’s jacket copy.
You should have two versions of this book description content: a short version that’s two to three sentences long, and a longer version that could fit on the back of your book.
If you’re only doing an ebook version, the longer version would be the same as or similar to your book’s Amazon/Kindle Store description.
2. Author Bio (short and long version)
Create a compelling bio for yourself. This is the same bio you will use on your Amazon Author Page and your website.
Again, include a short two-to-three-sentence version, as well as a longer version.
3. Book Covers
Include images of your book that are easy for people to download and use on their websites and on social media.
I recommend you have three versions:
- Front cover
- Full cover (front, back, and spine)
- 3D book cover
4. Author Headshots
Have your author photo available in several sizes, so people can quickly download them for their own use.
5. Blurbs and Testimonials
Any early blurbs, testimonials, or review excerpts for your book should also be available in your media kit.
This adds valuable social proof for people looking at your media kit, and makes it easy for them to add those hard-won blurbs to their own website.
By the way, blurbs and testimonials are basically the same thing. The only difference is, blurbs are from famous, recognizable people, and reader reviews or testimonials are from “normal” people.
6. Sample Interview Questions
Here’s the truth: Everyone is busy, especially people in the media.
Most of the time, when you see or hear an author being interviewed, the persion doing the interview hasn’t actually read the book. They’re either working off a quick perusal of the book, or notes given to them by someone else.
Other times, they’re simply offering up the interview questions that the author has provided.
Include five to 10 potential interview questions that people can ask you. Even if they don’t use them word-for-word, it gives interviewers invaluable direction on your book.
Remember, the #1 goal of your media kit is to make it easy to promote your book, and providing sample interview questions does exactly that.
7. Shareable Media
Make it easy for your fans to post about your book on social media. I recommend you create the following:
- Easily shareable links. Use a tool such as Share Link Generator to create links for Twitter, Facebook, Pinterest, etc., so that people can just click to share.
- Quotes as images. Create fun, interesting images with quotes from your book that people can share on social media. Make sure you include a link to your book’s Amazon page on each image. I recommend the fantastic tool Canva to easily create these.
- Other shareable media. Add any videos, graphic design, character sketches, etc. that you’ve created to offer engaging content that your fans can share.
8. Contact Information
It’s vital to add all of your contact information to the media kit, including:
- Author name
- Email address
- Physical address
- Phone number
- Social media info, such as your Facebook author page URL and Twitter ID
- Website(s), including your homepage and book page URLs
The How
Now that you have your media kit set up as a Google Doc, how do you make it easy to share?
Create a shareable link from inside your Google Doc.
Here’s how:
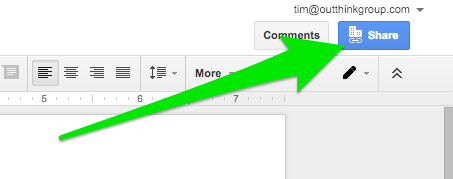
1. Click the blue “Share” button at the top right of the document.
2. A box will pop up. Choose “Can view” in the gray box on the right.
3. Then click “Get shareable link” at top right.
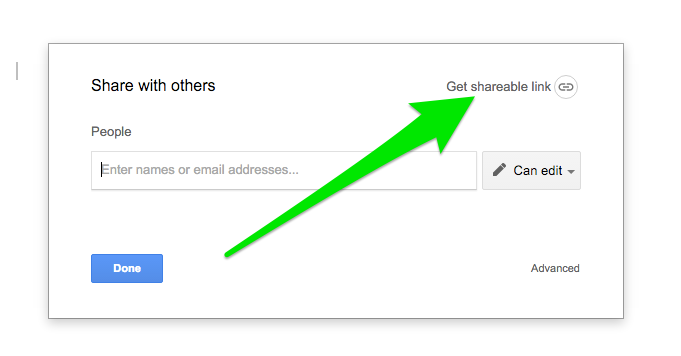
4. Copy the link provided.
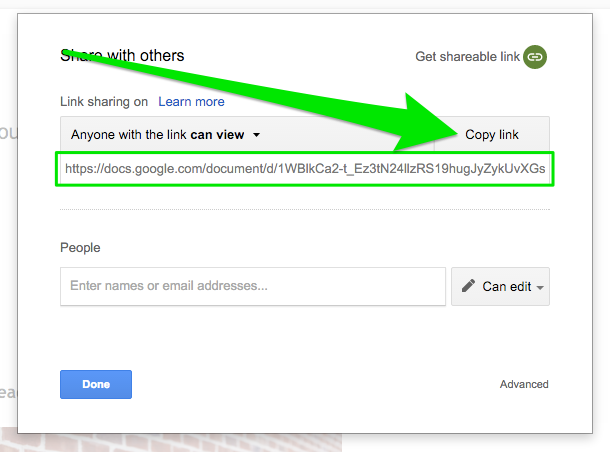
Now you have a link you can share, but it’s pretty big and unwieldy.
There are two ways to make this link much easier to share:
- The free version: Visit the Bitly website and create a free short link. All you have to do is paste your Google Doc share link into the box on their website, and they will create a short URL that’s much easier to share.
- The paid version: Buy a new domain that forwards to your media kit. This is my favorite way to do this. Purchase a domain such as www.booktitlemediakit.com. That way, when you tell people about your media kit, it will be easy to pass along the website. I recommend www.iwantmyname.com for purchasing domains — easy to use, secure, and no upsells pushing you to buy upgrades or add-ons.
The Bonus
Along with this article, I’m providing a free 15-minute video tutorial I created that will walk you through every step of this process.
I’ll also show you my own personal media kit I created, using this exact system.
Sign up below to get instant access.
Now that you have your perfect media kit, you’re ready to begin your book launch outreach!
Leave a Reply